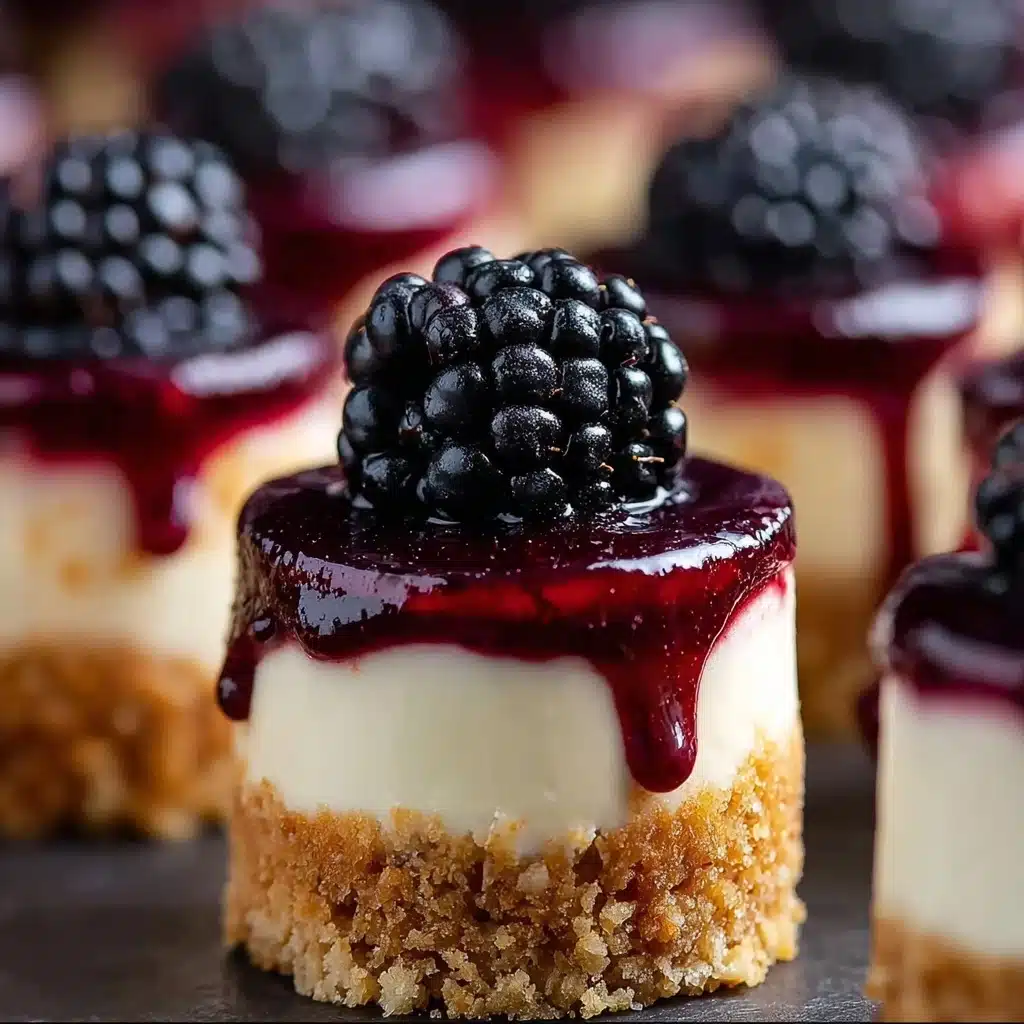
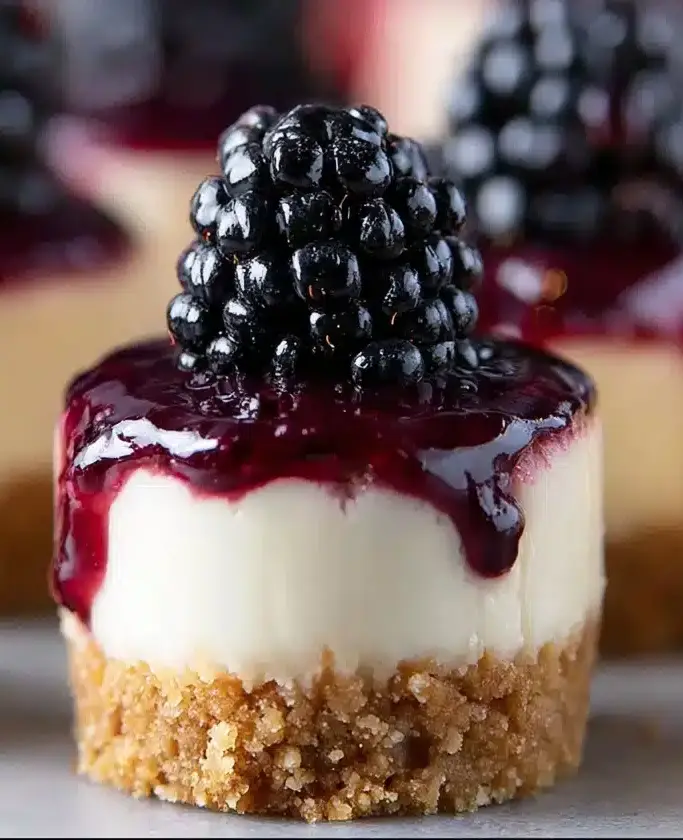
No-Bake Mini Blackberry Cheesecakes Recipe
If you are looking for a dessert that feels both indulgent and refreshingly light, you have to try this No-Bake Mini Blackberry Cheesecakes recipe. This is truly An Amazing Ultimate Recipe that brings together a crisp, buttery crust, a luscious and creamy filling, and the fresh burst of juicy blackberries on top. Whether you’re entertaining guests or treating yourself, these little cheesecakes deliver an impressive dessert experience without ever turning on the oven—a perfect harmony of flavors and textures that will make your taste buds sing.
Ingredients You’ll Need
These straightforward ingredients are the heroes of An Amazing Ultimate Recipe. Each one plays an essential role, from the crunchy, buttery graham cracker crust to the dreamy cream cheese filling, finished with sweet-tart blackberries that provide a pop of color and freshness.
- Graham cracker crumbs: Provide a buttery, crunchy base that holds the cheesecake wonderfully.
- Granulated sugar: Sweetens the crust and can be lightly sprinkled on the berries for extra sparkle.
- Unsalted butter, melted: Binds the crust ingredients together for a firm foundation.
- Cream cheese, softened: This is the creamy heart of the filling with a slightly tangy richness.
- Powdered sugar: Adds smooth sweetness to balance the cream cheese.
- Vanilla extract: Lends a warm, inviting fragrance and depth to the filling.
- Heavy whipping cream: Whipped to fluffy peaks to make the filling light and airy.
- Fresh blackberries: Offer a juicy, fresh finish with a gorgeous pop of vibrant color.
- Mint leaves (optional): Add a fresh, herbal note and an elegant touch for garnish.
How to Make No bake mini blackberry cheesecakes
Step 1: Prepare the Crust
Start by mixing your graham cracker crumbs, granulated sugar, and melted butter in a bowl until every crumb is beautifully coated and ready to hold together. This simple combination creates that irresistible crunchy base that gives an essential texture contrast to the creamy filling above.
Step 2: Distribute the Crust
Next, portion the crust mixture into your mini jars or cupcake liners. Press the mixture firmly down to create a compact, even layer. This step is crucial because a well-packed crust ensures you get that perfect bite every time without crumbling apart.
Step 3: Mix the Cheesecake Filling
Beat the softened cream cheese in a clean bowl until smooth and creamy. Slowly add in the powdered sugar and vanilla extract, continuing to mix until the filling looks luscious and velvety. This will become the rich yet light star of An Amazing Ultimate Recipe.
Step 4: Whip the Cream
In a separate bowl, whip your heavy cream until stiff peaks form. This airy cream will lighten the texture of the filling, making every mouthful feel like a cloud of deliciousness on your tongue.
Step 5: Combine
Gently fold the whipped cream into your cream cheese mixture. Take care here—fold slowly and carefully to maintain the fluffy texture. It’s this step that transforms the filling from dense to delightfully light, enhancing the overall experience of An Amazing Ultimate Recipe.
Step 6: Fill Jars
Now spoon the cheesecake filling over the crust layers in your jars or liners, filling each to the top and smoothing the surface. Your little cheesecakes are really starting to shine, just waiting for that final fruity flourish.
Step 7: Chill
Cover the jars with plastic wrap and place them in the refrigerator for at least 4 hours. This chilling time is key to allowing the filling to set properly, so be patient—this is what makes your dessert a delightful handheld treat that’s firm yet creamy.
Step 8: Prepare Topping (Optional)
If you prefer a sweeter touch, toss the fresh blackberries with a bit of sugar and let them macerate for about 15 minutes. This simple step helps release the berries’ natural juices while adding a lovely glossy shine and deeper flavor for the crowning glory.
Step 9: Top the Cheesecakes
Just before serving, place the sugared blackberries atop each mini cheesecake and add a sprig of mint if you wish. This final step brings a pop of color and freshness that perfectly complements the creamy filling, making An Amazing Ultimate Recipe irresistible to the eyes and palate alike.
Step 10: Serve
Arrange your mini cheesecakes on a serving platter, ready to wow friends and family. Their charming size and elegant look make them perfect for parties, afternoon treats, or any time you want to indulge in a little luxury without fuss.
How to Serve No bake mini blackberry cheesecakes
Garnishes
Fresh mint is a classic choice that adds a hint of herbal brightness and an extra layer of visual appeal to each mini cheesecake. For a slightly different twist, you could sprinkle some finely grated lemon zest over the berries to brighten the flavors further, giving your An Amazing Ultimate Recipe a refreshing citrus kick.
Side Dishes
These mini cheesecakes are a perfect standalone dessert but pair beautifully with a light fruit salad or a small scoop of sorbet. Their richness is nicely balanced by fresh, tangy accompaniments, making your dessert course feel thoughtfully complete and well-rounded.
Creative Ways to Present
Presenting the cheesecakes in clear mini jars lets your guests admire the beautiful layers of crust, filling, and berries. Alternatively, serve them in colorful cupcake liners for a playful touch or arrange them on a tiered dessert stand to elevate the presentation and wow your guests at any event.
Make Ahead and Storage
Storing Leftovers
Keep any leftover mini cheesecakes covered in the refrigerator. They remain fresh and delicious for up to 3 days, which is perfect if you want to enjoy An Amazing Ultimate Recipe over a few days without sacrificing flavor or texture.
Freezing
If you need to store these longer, freezing is an option. Place the cheesecakes in an airtight container, ensuring they are well separated to avoid sticking. When you’re ready to enjoy, thaw them overnight in the fridge to retain that signature creamy texture that makes this An Amazing Ultimate Recipe so special.
Reheating
This dessert is best enjoyed chilled, so no reheating is necessary. Simply take your mini cheesecakes out of the fridge, let them sit for a few minutes to soften slightly, and then indulge in the perfect balance of creamy and fresh flavors.
FAQs
Can I use frozen blackberries for this recipe?
Fresh blackberries are ideal for topping, but if using frozen, thaw and drain them well before adding. Keep in mind that thawed berries might release more juice, which can affect the presentation but still taste delicious.
Is it possible to make these gluten-free?
Absolutely! Just swap the graham cracker crumbs for a gluten-free alternative of your choice. The crust will still hold together nicely and deliver the same buttery crunch you love.
Can I make the filling ahead of time?
Yes, you can prepare the cheesecake filling a day in advance and keep it refrigerated. When ready to assemble, fold in the whipped cream and layer the desserts with the crust and toppings.
How long do these mini cheesecakes need to chill?
You should refrigerate them for at least 4 hours to let the filling set properly. For best results, chilling overnight is even better and enhances the flavors and texture perfectly.
Can I substitute the heavy cream with something lighter?
Heavy cream gives the filling its signature airy texture, so substituting it with lighter options is not recommended if you want to keep the dessert light and creamy. For a lower-fat version, try using whipped coconut cream but expect a slight difference in flavor.
Final Thoughts
This No-Bake Mini Blackberry Cheesecakes recipe truly captures the delight of An Amazing Ultimate Recipe with every bite. It’s a dessert that feels luxurious but is surprisingly easy to prepare, perfect for impressing friends or sneaking a sweet moment just for yourself. I cannot wait for you to try these charming little treats and discover how magical simple ingredients combined thoughtfully can be. Go ahead, make your day sweeter with An Amazing Ultimate Recipe!
PrintAn Amazing Ultimate Recipe
These No-Bake Mini Blackberry Cheesecakes are a delightful and easy-to-make dessert perfect for any occasion. Featuring a crisp graham cracker crust, a creamy and smooth cheesecake filling, and topped with fresh, juicy blackberries, these mini cheesecakes require no baking and are ready in just a few hours of chilling. Ideal for summer gatherings or quick sweet treats, they combine refreshing flavors with a rich texture to satisfy your dessert cravings.
- Prep Time: 20 minutes
- Cook Time: 0 minutes
- Total Time: 4 hours 20 minutes
- Yield: 8 mini cheesecakes 1x
- Category: Dessert
- Method: No-Bake
- Cuisine: American
- Diet: Vegetarian
Ingredients
For the Crust:
- 1 cup graham cracker crumbs
- 1/4 cup granulated sugar
- 1/2 cup unsalted butter, melted
For the Cheesecake Filling:
- 16 oz cream cheese, softened
- 1 cup powdered sugar
- 1 teaspoon vanilla extract
- 1 cup heavy whipping cream
For the Topping:
- 1 cup fresh blackberries
- 2 tablespoons sugar (optional)
- Mint leaves for garnish (optional)
Instructions
- Prepare the Crust: In a mixing bowl, combine graham cracker crumbs, granulated sugar, and melted butter. Mix until the crumbs are evenly coated and form a crumbly mixture.
- Distribute the Crust: Portion the graham cracker mixture into mini jars or cupcake liners. Press down firmly to create a compact and even crust at the bottom of each container.
- Mix the Cheesecake Filling: In another bowl, beat the softened cream cheese until it becomes smooth and creamy. Gradually add powdered sugar and vanilla extract while continuing to beat until the mixture is well combined and silky.
- Whip the Cream: In a separate chilled bowl, whip the heavy whipping cream until stiff peaks form to add lightness and volume to the cheesecake filling.
- Combine: Gently fold the whipped cream into the cream cheese mixture carefully to maintain the airy texture, ensuring the mixture is smooth and uniform without deflating the cream.
- Fill Jars: Spoon the cheesecake filling evenly over the prepared crust in each mini jar or liner, filling to the top. Smooth the surface with a spatula for a neat finish.
- Chill: Cover the cheesecakes with plastic wrap or lids and refrigerate for at least 4 hours to allow the filling to set properly.
- Prepare Topping (Optional): If you prefer a sweeter topping, toss fresh blackberries with sugar and let them sit for about 15 minutes to release their juices, enhancing their natural sweetness.
- Top the Cheesecakes: Just before serving, place the sugared or plain blackberries atop each mini cheesecake and garnish with a mint leaf for added freshness and visual appeal.
- Serve: Arrange the mini cheesecakes on a serving platter and enjoy this delicious no-bake treat with your guests.
Notes
- Use full-fat cream cheese and heavy cream for the best creamy texture and flavor.
- To soften cream cheese quickly, leave it out at room temperature for about 30 minutes before mixing.
- You can substitute graham cracker crumbs with digestive biscuits or any similar cookie crumbs for the crust.
- If you prefer a less sweet dessert, reduce the sugar in the crust and filling to your taste.
- These mini cheesecakes can be stored in the refrigerator for up to 3 days; do not freeze as texture may be affected.
- For a different berry topping, try raspberries or blueberries for a twist.
- If whipping cream is challenging, chilling your bowl and beaters beforehand helps achieve stiff peaks faster.
Nutrition
- Serving Size: 1 mini cheesecake (approximately 100g)
- Calories: 320 kcal
- Sugar: 25g
- Sodium: 160mg
- Fat: 22g
- Saturated Fat: 13g
- Unsaturated Fat: 7g
- Trans Fat: 0g
- Carbohydrates: 22g
- Fiber: 2g
- Protein: 5g
- Cholesterol: 75mg
Keywords: No-bake cheesecake, mini cheesecakes, blackberry cheesecake, easy dessert, summer dessert, no bake, creamy cheesecake, berry topping