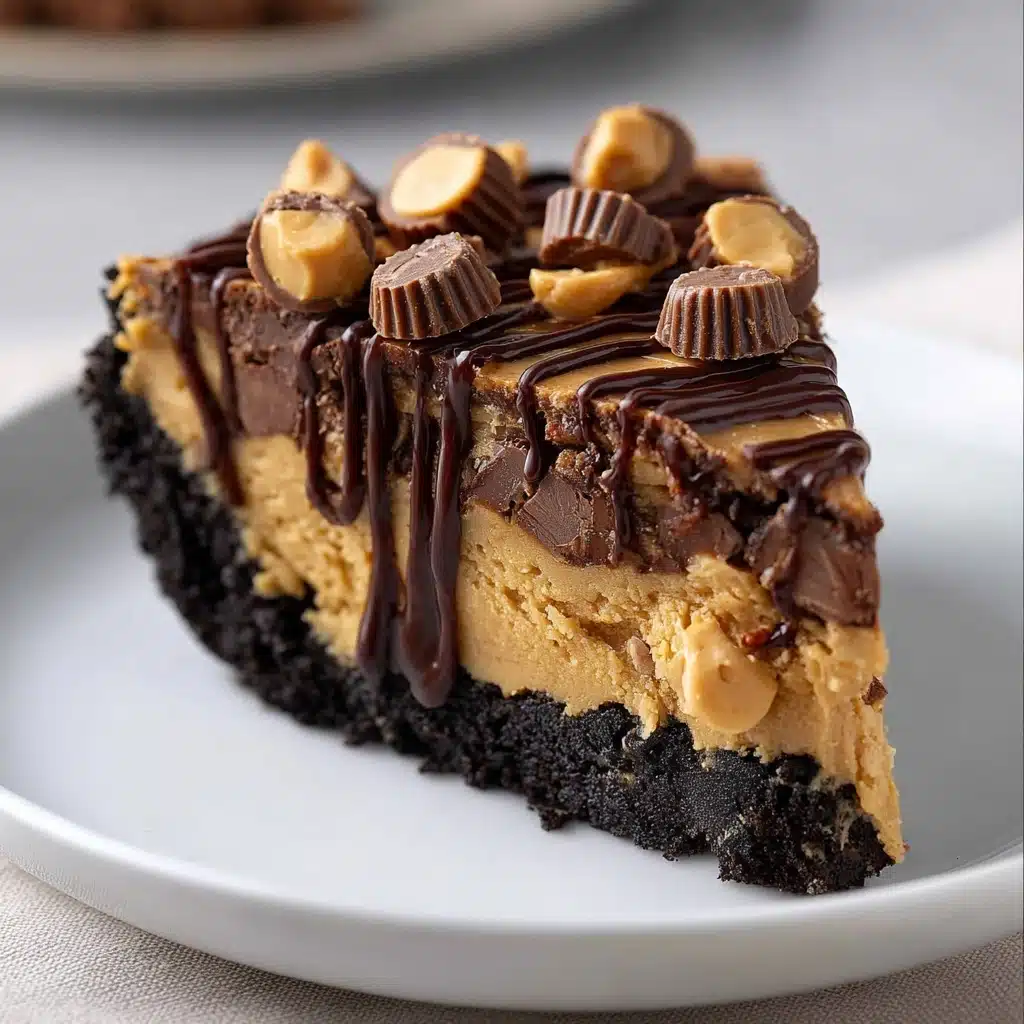
Peanut Butter Cup Dump Cake Recipe
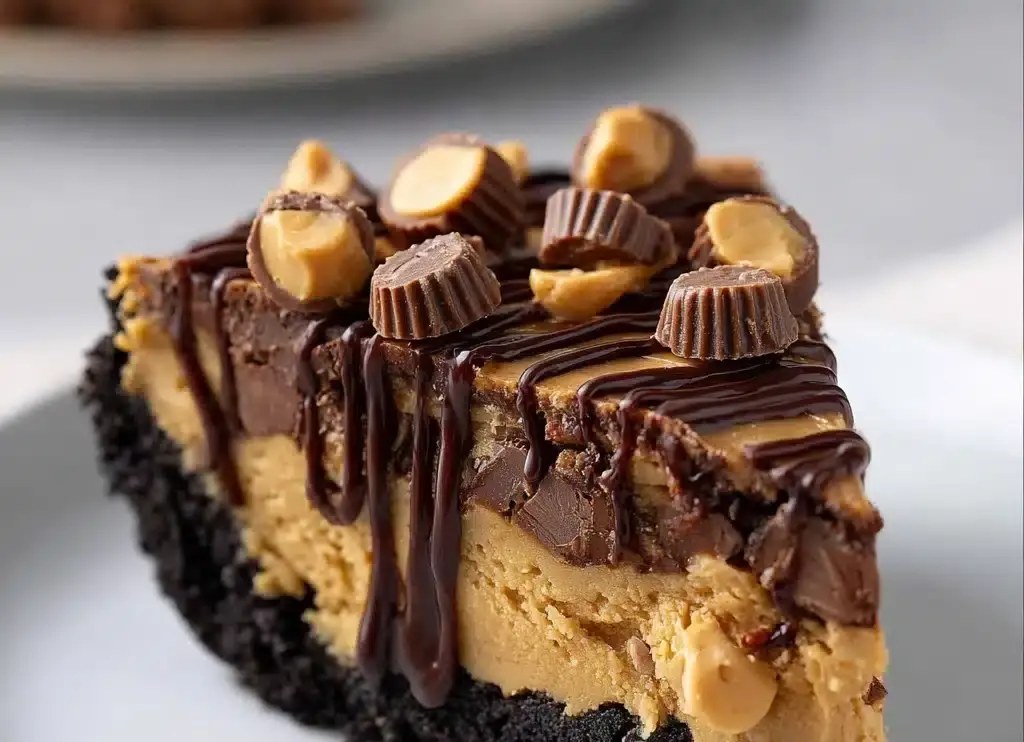
If you’re craving a dessert that feels like a warm hug from the inside out, the Peanut butter cup dump cake is your new best friend. Imagine rich chocolate cake shimmering with melted peanut butter cups and a luscious peanut butter layer beneath, all baked together effortlessly in one dish. This cake isn’t just about bold flavors; it’s about simplicity meeting indulgence in the most joyful way. Every bite offers a perfect balance of creamy peanut butter sweetness and fudgy chocolate goodness, making it a go-to for gatherings, weeknight cravings, or those moments when you just want to spoil yourself without any stress.
Ingredients You’ll Need
This recipe shines because it calls for simple, pantry-friendly ingredients that each play a starring role in making this cake a showstopper. Every item contributes to the rich texture and bold flavors that make this dessert unforgettable.
- 1 box chocolate cake mix: Devil’s food is my top pick for deep chocolate flavor, but any chocolate cake mix will work.
- 1 cup peanut butter: Creamy spreads smoothly for a luscious layer; crunchy adds a delightful texture twist.
- 1/2 cup melted butter: Real butter melts beautifully and enriches the cake’s moistness.
- 1 1/2 cups milk: Whole milk creates the richest batter, but you can use your favorite milk alternative.
- 1 cup mini peanut butter cups: These melt evenly and create pockets of melty sweetness without any chopping.
- 1/2 cup chocolate chips: Semi-sweet balances sweetness perfectly; milk or dark chocolate chips also work great.
- Pro tip: Let your peanut butter sit at room temperature for 30 minutes to make spreading effortless.
How to Make Peanut butter cup dump cake
Step 1: Prep Your Pan and Peanut Butter Layer
First things first, preheat your oven to 350°F (175°C) and lightly grease a 9×13-inch baking dish. This step ensures your cake slides out easily when ready. Next, scoop your room-temperature peanut butter right into the pan. Use a butter knife or offset spatula to spread it evenly across the bottom. It doesn’t need to be perfect – this peanut butter layer bakes into a fudgy ribbon that’s pure magic once sliced.
Step 2: Whisk Together Your Batter
In a large bowl, combine your chocolate cake mix, melted butter, and milk. Whisk until smooth and free of lumps, but don’t overdo it – a few tiny lumps won’t hurt. You want a thick but pourable batter, similar to pancake batter. If it feels too thick, add a splash more milk to get just the right texture for spreading evenly over the peanut butter layer.
Step 3: Layer and Add Toppings
Pour the luscious chocolate batter directly over the peanut butter in your pan, letting it settle evenly. Now, sprinkle your mini peanut butter cups and chocolate chips all over the top. As it bakes, these melt perfectly into the cake, creating little pockets of gooey delight with every bite. This is the part where the 1 bowl peanut butter cup dump cake delight devours time really starts to come to life!
Step 4: Bake to Perfection
Place your pan in the oven and bake for 35 to 40 minutes. Check for doneness by inserting a toothpick into the center: it should come out with moist crumbs, not raw batter. You’ll also notice the edges gently pulling away from the pan. Resist the urge to dive in right away and let your cake cool for at least 15 minutes to help the layers settle beautifully.
How to Serve Peanut butter cup dump cake
Garnishes
To elevate the indulgence, sprinkle a few extra mini peanut butter cups and chocolate shavings over the top right before serving. A light dusting of powdered sugar or a drizzle of caramel sauce adds a decadent touch that’s sure to impress anyone lucky enough to share this dessert with you.
Side Dishes
While this cake shines as a party all on its own, it pairs exceptionally well with a scoop of cold vanilla ice cream or a dollop of whipped cream. Fresh berries or salted caramel sauce on the side add a refreshing contrast to the rich flavors.
Creative Ways to Present
For a fun twist, serve individual portions in clear dessert cups layered with extra peanut butter cups and whipped cream. Or, try warm slices draped with hot fudge sauce and crushed peanuts for a decadent, restaurant-style presentation that will have everyone asking for seconds.
Make Ahead and Storage
Storing Leftovers
Leftovers of the 1 bowl peanut butter cup dump cake delight devours time are best stored covered at room temperature for up to two days. Beyond that, refrigeration is your friend to keep it fresh, though the texture may firm up slightly.
Freezing
This cake freezes beautifully! Wrap individual slices tightly in plastic wrap and place them in a freezer-safe container. They’ll keep well for up to three months and thaw quickly when you want a quick treat.
Reheating
To bring your leftover cake back to life, microwave a slice for about 15 seconds or warm it in a low oven (around 300°F / 150°C) until heated through. Pair with freshly scooped ice cream for an irresistible warm-cold combo.
FAQs
Can I use crunchy peanut butter instead of creamy?
Absolutely! Crunchy peanut butter adds a delightful texture that some people love. Just be aware that creamy peanut butter spreads more smoothly and creates that luscious fudgy layer we crave.
Do I have to use mini peanut butter cups?
Mini peanut butter cups melt evenly, creating nice pockets of flavor. Using regular or larger cups might cause uneven melting and could change the texture, but if that’s what you have, go for it!
What if I don’t have whole milk? Can I substitute?
Yes! Any milk works, including plant-based ones like oat or almond milk. The cake may be a bit less rich, but the flavor will still be fantastic.
Is this cake very sweet? Can I adjust the sweetness?
It’s delightfully sweet but balanced thanks to the semi-sweet chocolate chips. If you prefer less sweetness, try using dark chocolate chips or reducing the quantity of peanut butter cups slightly.
Can I make this cake gluten-free?
Definitely! Use a gluten-free chocolate cake mix, and ensure your peanut butter cups and chocolate chips are gluten-free. This way, everyone can enjoy the magic of the 1 bowl peanut butter cup dump cake delight devours time.
Final Thoughts
Seriously, if you haven’t tried the 1 bowl peanut butter cup dump cake delight devours time yet, you’re in for a treat that’s as easy as it is incredible. This cake feels like a celebration of peanut butter and chocolate done right, with no fuss and all the flavors you crave. So go ahead, get mixing, baking, and indulging—you’ll wonder how you ever lived without it.
Print1 bowl peanut butter cup dump cake delight devours time Recipe
Peanut Butter Cup Dump Cake Delight is an easy, indulgent dessert that layers smooth peanut butter with rich chocolate cake batter, topped with mini peanut butter cups and chocolate chips. It’s a quick bake requiring minimal prep, perfect for chocolate and peanut butter lovers looking for a deliciously fudgy treat with melty pockets of peanut butter goodness.
- Prep Time: 10 minutes
- Cook Time: 35-40 minutes
- Total Time: 50 minutes
- Yield: 12 servings 1x
- Category: Dessert
- Method: Baking
- Cuisine: American
- Diet: Halal
Ingredients
Peanut Butter Layer
- 1 cup creamy peanut butter (room temperature)
Cake Batter
- 1 box chocolate cake mix (devil’s food preferred)
- 1/2 cup melted real butter
- 1 1/2 cups milk (whole milk recommended)
Toppings
- 1 cup mini peanut butter cups
- 1/2 cup semi-sweet chocolate chips
Instructions
- Preheat and Prepare Pan: Preheat your oven to 350°F (175°C). Grease a 9×13-inch baking dish with cooking spray or butter to prevent sticking.
- Spread Peanut Butter: Using room-temperature peanut butter, evenly spread it over the bottom of the prepared pan with a butter knife or offset spatula. Coverage doesn’t need to be perfect but try to cover the entire bottom for that fudgy base.
- Mix Cake Batter: In a large bowl, combine the chocolate cake mix, melted butter, and milk. Whisk until smooth with no dry pockets; a few small lumps are okay. Batter should be thick yet pourable. Adjust thickness by adding a splash more milk if too thick or a tablespoon of flour if too thin.
- Assemble Cake: Pour the chocolate cake batter evenly over the peanut butter layer in the pan. Then sprinkle the mini peanut butter cups and chocolate chips evenly across the top. They will partially sink during baking to create melty pockets.
- Bake: Bake for 35-40 minutes. Check doneness by observing the edges pulling away from the pan and inserting a toothpick in the center; it should come out with moist crumbs but no wet batter.
- Cool and Serve: Allow the cake to cool in the pan for at least 15 minutes to let the layers set, ensuring clean slices. Serve as is, or add a scoop of vanilla ice cream for an extra comforting treat.
Notes
- Let peanut butter come to room temperature for easier spreading and smoother texture.
- Mini peanut butter cups are preferred over regular size for better melting and even distribution.
- Check your oven as it may run hot; start checking doneness at 30 minutes.
- You can substitute almond butter for peanut butter if avoiding peanuts.
- Try different chocolate chips such as dark or white chocolate for varied sweetness and richness.
- Milk alternatives like oat or almond milk can be used, though the cake may be slightly less rich.
- Cooling the cake before slicing helps the layers set and prevents crumbling.
Nutrition
- Serving Size: 1 slice (1/12 of cake)
- Calories: 370
- Sugar: 28g
- Sodium: 220mg
- Fat: 22g
- Saturated Fat: 10g
- Unsaturated Fat: 10g
- Trans Fat: 0.5g
- Carbohydrates: 35g
- Fiber: 3g
- Protein: 7g
- Cholesterol: 40mg
Keywords: peanut butter cup dump cake, easy chocolate dessert, peanut butter chocolate cake, quick dump cake, chocolate peanut butter dessert, mini peanut butter cups cake