Cheesy Garlic Chicken Wraps Recipe
Introduction
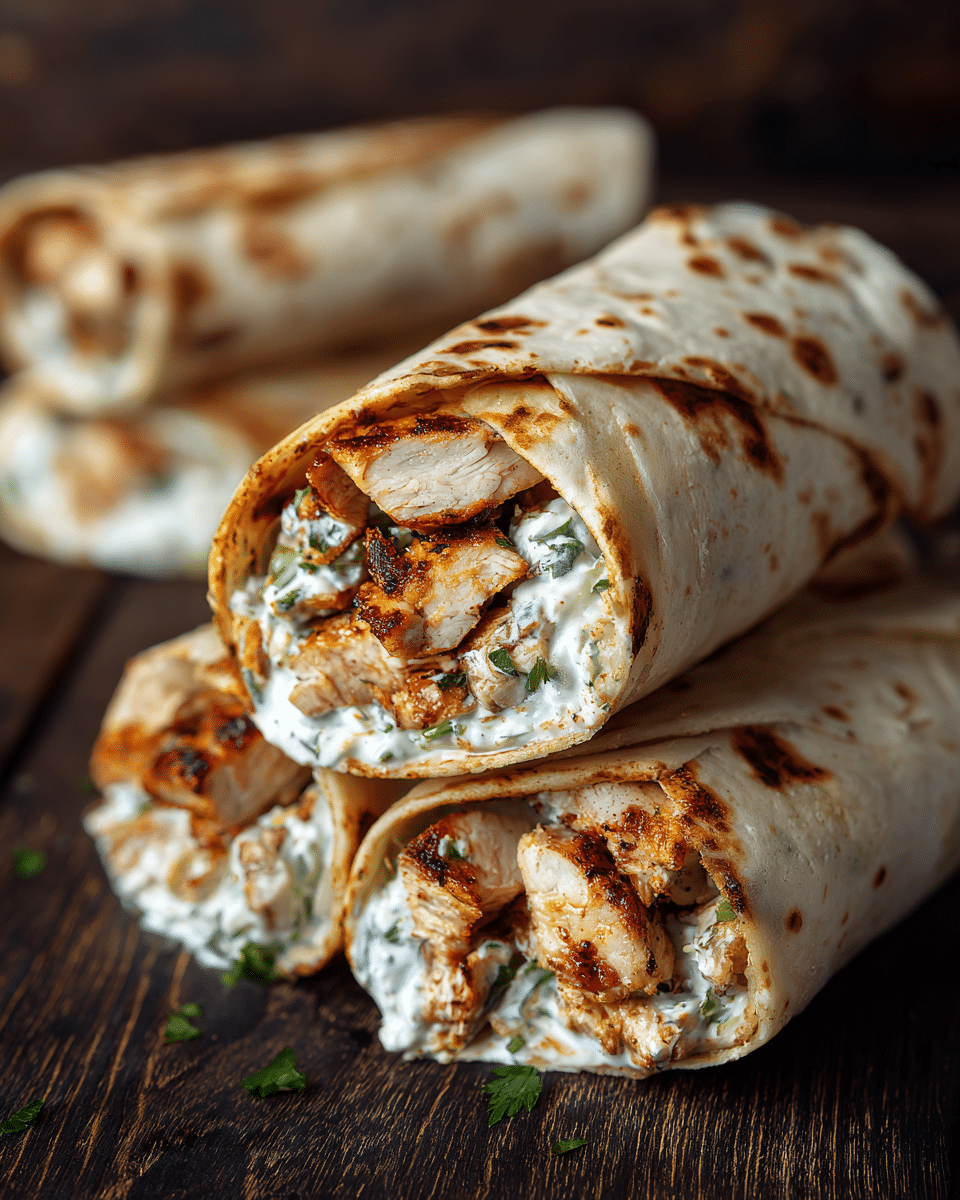
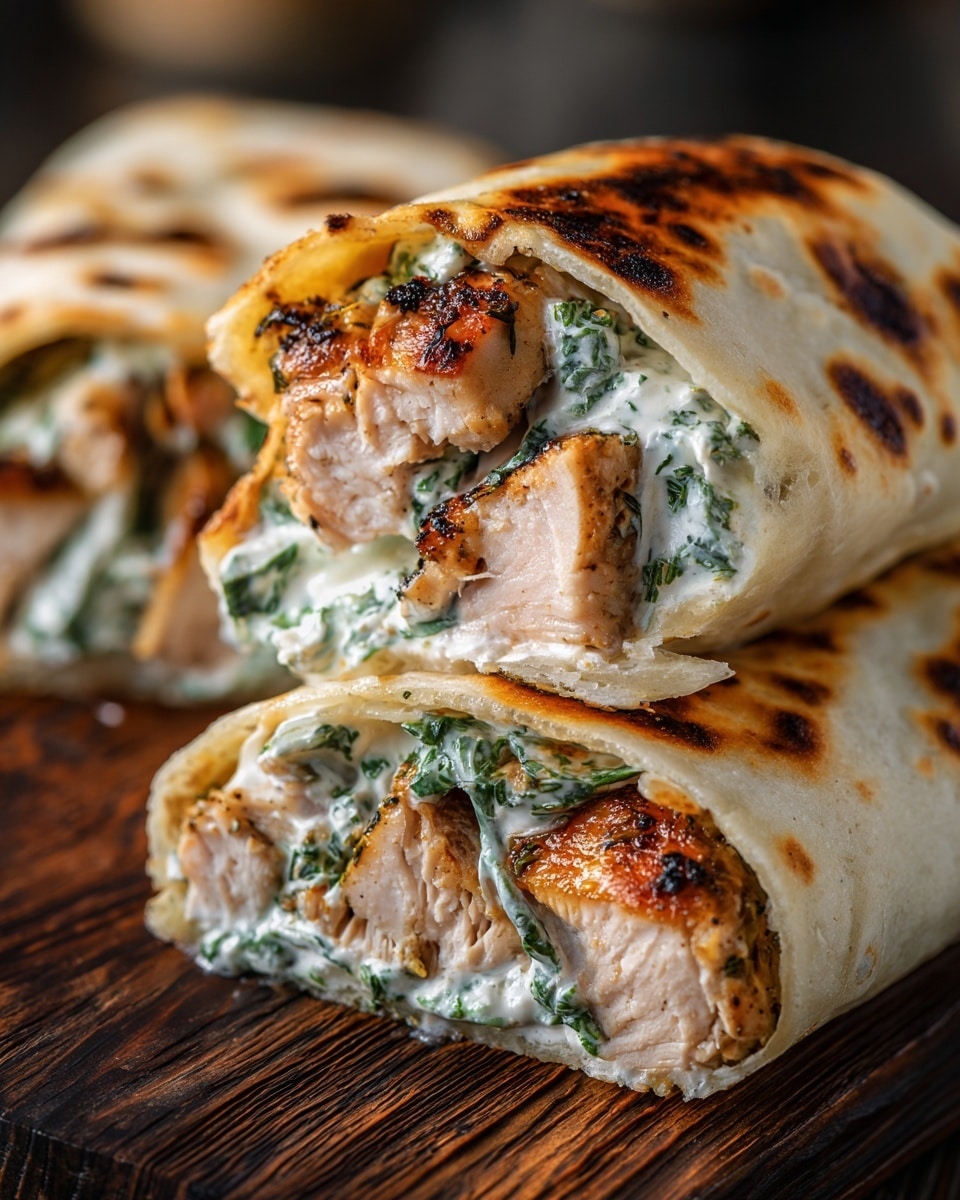
Cheesy Garlic Chicken Wraps make a quick and satisfying meal packed with tender chicken, gooey melted cheese, and flavorful garlic. These wraps are easy to prepare and perfect for lunch or dinner when you want something comforting and delicious.
Ingredients
- 2 cups cooked chicken, shredded
- 1 cup shredded mozzarella cheese
- 2 tablespoons butter
- 3 cloves garlic, minced
- ½ teaspoon Italian seasoning
- Salt and pepper, to taste
- 4 large flour tortillas
- Fresh parsley, chopped (for garnish)
Instructions
- Step 1: In a large skillet, melt the butter over medium heat.
- Step 2: Add the minced garlic and sauté for 1-2 minutes until fragrant.
- Step 3: Stir in the shredded chicken, mixing it with the garlic.
- Step 4: Season with Italian seasoning, salt, and pepper, stirring well to combine.
- Step 5: Add the shredded mozzarella cheese and stir until the cheese melts and blends into the chicken mixture.
- Step 6: Lay out the flour tortillas and evenly divide the cheesy chicken mixture among them.
- Step 7: Fold the sides of each tortilla inward, then roll tightly from the bottom to form wraps.
- Step 8: (Optional) Place wraps seam-side down in the skillet and toast on medium heat for 2-3 minutes per side until golden brown.
- Step 9: Remove from heat, slice wraps in half, and garnish with chopped fresh parsley before serving.
Tips & Variations
- For extra flavor, add a dash of crushed red pepper flakes or swap mozzarella for pepper jack cheese to give the wraps a spicy kick.
- You can substitute cooked rotisserie chicken to save time.
- Serve with a side of salsa or sour cream for dipping.
- Use whole wheat or spinach tortillas for a healthier twist.
Storage
Store any leftover wraps in an airtight container in the refrigerator for up to 3 days. To reheat, warm them in a skillet over medium heat or microwave until heated through, keeping them crispy and melty.
How to Serve
Serve this delicious recipe with your favorite sides.
FAQs
Can I prepare the chicken mixture ahead of time?
Yes, you can make the cheesy garlic chicken mixture in advance and refrigerate it for up to 2 days. Assemble and toast the wraps just before serving for the best texture.
Can I freeze these wraps?
Yes, wrap the assembled but uncooked wraps tightly in plastic wrap and freeze for up to 1 month. Thaw overnight in the refrigerator before toasting or reheating.
PrintCheesy Garlic Chicken Wraps Recipe

Cheesy Garlic Chicken Wraps combine tender shredded chicken with melted mozzarella and fragrant garlic, all wrapped in soft flour tortillas. This quick and easy recipe is perfect for a satisfying lunch or dinner, featuring a savory blend of Italian seasoning and melted cheese for a deliciously gooey filling.
- Prep Time: 10 minutes
- Cook Time: 10 minutes
- Total Time: 20 minutes
- Yield: 4 wraps 1x
- Category: Main Course
- Method: Stovetop
- Cuisine: American
Ingredients
Cheesy Garlic Chicken Filling
- 2 cups cooked chicken, shredded
- 1 cup shredded mozzarella cheese
- 2 tablespoons butter
- 3 cloves garlic, minced
- ½ teaspoon Italian seasoning
- Salt and pepper, to taste
Wraps
- 4 large flour tortillas
- Fresh parsley, chopped (for garnish)
Instructions
- Melt the Butter: In a large skillet, melt the butter over medium heat to prepare a rich base for the garlic and chicken.
- Sauté Garlic: Add the minced garlic to the melted butter and sauté for 1-2 minutes until fragrant, infusing the butter with delicious garlic flavor.
- Add Chicken: Stir in the shredded cooked chicken and combine it well with the garlic-butter mixture.
- Season: Sprinkle Italian seasoning, salt, and pepper over the chicken mixture, stirring thoroughly to evenly distribute the seasonings.
- Melt Cheese: Add the shredded mozzarella cheese into the skillet, mixing continuously until it melts and blends with the chicken to create a gooey, cheesy filling.
- Prepare Wraps: Lay out the flour tortillas flat on a clean surface and evenly divide the cheesy chicken mixture among them.
- Wrap: Fold the sides of each tortilla inward, then roll from the bottom tightly to form a secure wrap.
- Cook Wraps (Optional): For a warm, golden finish, place each wrap seam-side down back into the skillet and toast over medium heat for 2-3 minutes per side until crisp and golden brown.
- Slice and Serve: Remove the wraps from the skillet, slice them in half, and garnish with freshly chopped parsley for a vibrant, fresh touch before serving.
Notes
- Using cooked chicken saves time; rotisserie chicken works great.
- Optional to toast wraps for added crispiness and flavor.
- Substitute mozzarella with cheddar or a cheese blend for variation.
- Add vegetables like spinach or roasted red peppers for extra nutrition.
- Serve with a side of salsa, sour cream, or a fresh salad for a complete meal.
Keywords: cheesy garlic chicken wraps, chicken wraps, easy chicken recipe, mozzarella chicken wrap, stovetop wraps, quick dinner, garlic chicken