Chia Cookies Recipe
Introduction
These chia cookies combine the rich creaminess of peanut butter with the subtle crunch of chia seeds for a delightful treat. Naturally sweetened with honey, they’re a wholesome snack that’s quick to prepare and perfect for any time of day.
Ingredients
- 1/2 cup smooth peanut butter
- 1/3 cup honey
- 2 Tbsp whole milk (or plant-based milk)
- 2 Tbsp extra virgin olive oil
- 1 tsp vanilla extract
- 1 cup (150g/5.3 oz.) all-purpose flour (scoop & leveled)
- 1 tsp baking powder
- 2 Tbsp chia seeds
Instructions
- Step 1: Preheat your oven to 320ºF (160ºC) and line a large flat baking tray with parchment paper. Set aside.
- Step 2: In a large mixing bowl, combine the peanut butter, honey, milk, olive oil, and vanilla extract. Whisk until the mixture is smooth and well blended.
- Step 3: Add the flour, baking powder, and chia seeds to the wet ingredients. Use a wooden spoon to stir everything together until a soft dough forms.
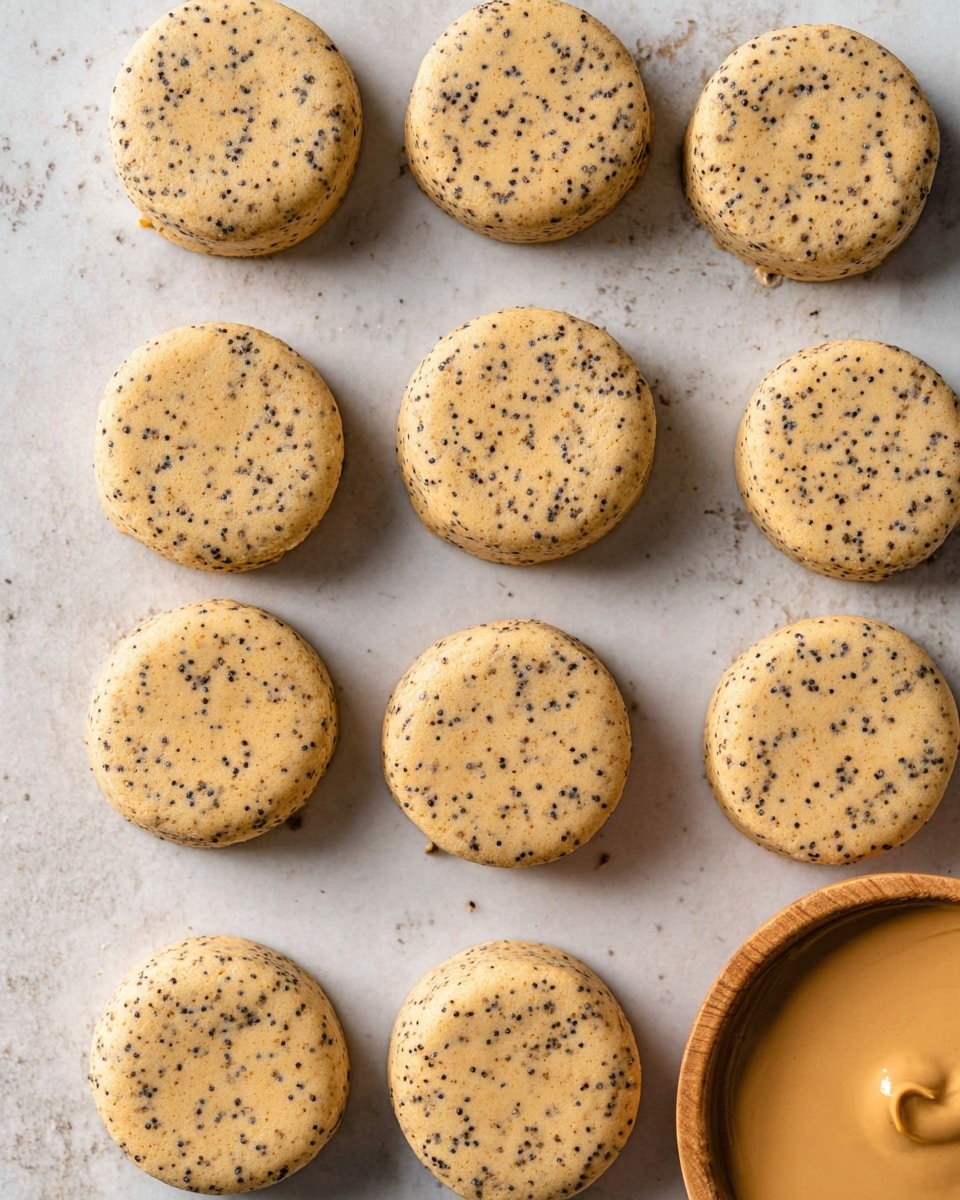
- Step 4: Take about one heaped tablespoon of dough and roll it into a smooth ball. Place it on the prepared tray and gently press down to shape a domed cookie. Repeat with the remaining dough, leaving a small gap between each cookie.
- Step 5: Bake the cookies for 12-15 minutes, or until they are lightly golden and slightly cracked on top.
- Step 6: Let the cookies cool on the baking tray for 3 minutes before transferring them to a wire rack to cool completely. Enjoy!
Tips & Variations
- Try substituting almond butter for peanut butter for a different nutty flavor.
- Add a handful of dark chocolate chips or chopped nuts for extra texture and sweetness.
- For a vegan option, replace honey with maple syrup and use plant-based milk.
- Ensure you scoop and level your flour to keep the cookie texture consistent.
Storage
Store the cooled cookies in an airtight container at room temperature for up to 5 days. For longer storage, freeze them in a sealed bag for up to 3 months. To enjoy, thaw at room temperature or warm slightly in the oven.
How to Serve

Serve this delicious recipe with your favorite sides.
FAQs
Can I use other seeds instead of chia seeds?
Yes, you can substitute flaxseeds or hemp seeds if preferred, but chia seeds add a unique crunch and nutritional boost.
Will these cookies spread while baking?
These cookies hold their shape well due to the dough’s consistency, so they should only spread slightly. Pressing them into a dome shape before baking helps ensure an even, attractive look.
PrintChia Cookies Recipe
Deliciously soft and slightly crunchy chia cookies made with peanut butter, honey, and a hint of vanilla. These wholesome treats combine the nutty flavor of peanut butter with the nutritional boost of chia seeds, baked to perfection for a light golden finish.
- Prep Time: 10 minutes
- Cook Time: 15 minutes
- Total Time: 25 minutes
- Yield: 12 cookies 1x
- Category: Dessert
- Method: Baking
- Cuisine: American
- Diet: Vegetarian
Ingredients
Wet Ingredients
- 1/2 cup smooth peanut butter
- 1/3 cup honey
- 2 Tbsp whole milk (or plant-based milk)
- 2 Tbsp extra virgin olive oil
- 1 tsp vanilla extract
Dry Ingredients
- 1 cup (150g/5.3 oz.) all-purpose flour, scoop & leveled
- 1 tsp baking powder
- 2 Tbsp chia seeds
Instructions
- Preheat Oven: Set your oven to 320ºF (160ºC) and line a large flat baking tray with parchment paper. Set aside.
- Mix Wet Ingredients: In a large mixing bowl, combine peanut butter, honey, milk, olive oil, and vanilla extract. Whisk until the mixture is smooth, ensuring all ingredients are fully incorporated and creamy.
- Add Dry Ingredients: To the same bowl, add all-purpose flour, baking powder, and chia seeds. Use a wooden spoon to stir gently but thoroughly until a soft dough forms that holds together without being too sticky.
- Shape Cookies: Take about one heaped tablespoon of dough and roll it into a smooth ball. Place it on the prepared baking tray and gently press down to form a slightly domed cookie shape. Repeat this step with the remaining dough, keeping a small gap between each cookie to allow for spreading during baking.
- Bake: Place the tray in the preheated oven and bake for 12-15 minutes. Cookies should turn lightly golden and develop slight cracks on the top, indicating they are perfectly baked.
- Cool: Remove the cookies from the oven and let them cool on the baking tray for 3 minutes. Then transfer them to a wire rack to cool completely before serving or storing.
Notes
- You can substitute whole milk with any plant-based milk according to your dietary preference.
- For a more intense nutty flavor, use natural peanut butter without added sugar or salt.
- If you prefer crispier cookies, bake for the full 15 minutes but monitor carefully to avoid over-browning.
- Store cookies in an airtight container at room temperature for up to 5 days.
- Adding chia seeds enhances the nutritional value by adding fiber, omega-3 fatty acids, and protein.
Keywords: chia cookies, peanut butter cookies, healthy cookies, baked cookies, easy dessert, chia seed recipe, homemade cookies