Quick No-Bake Salted Caramel Pretzel Bars Recipe
Introduction
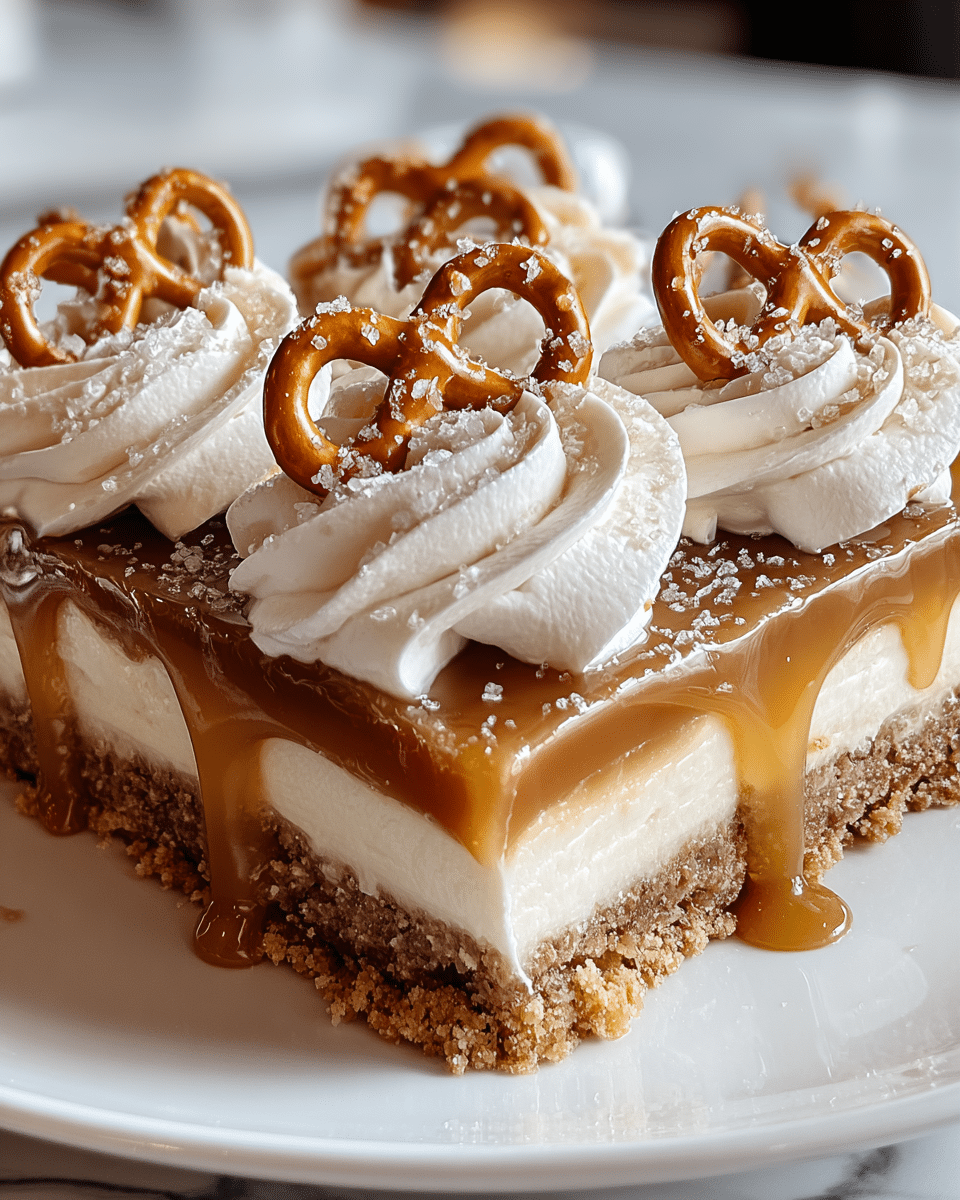
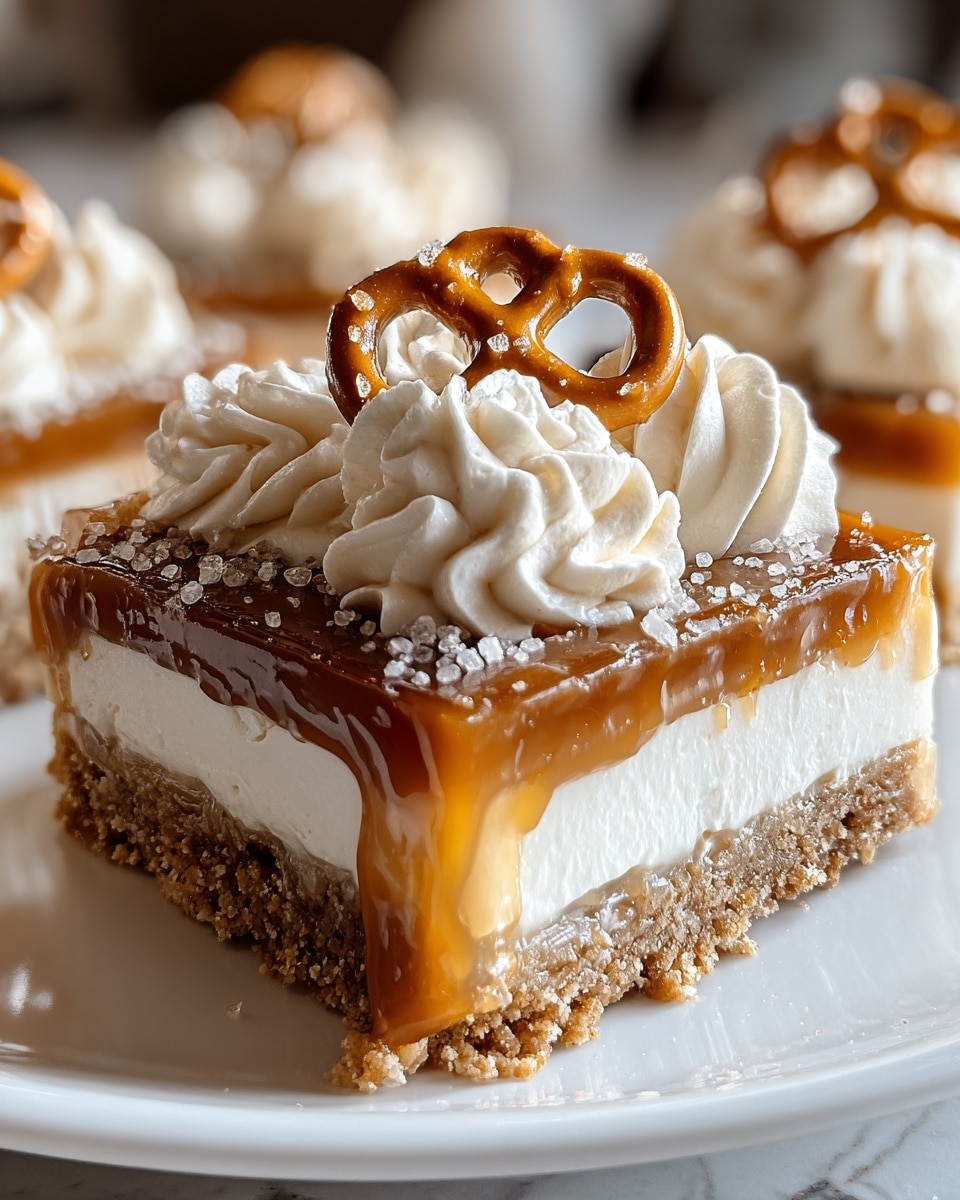
These Quick No-Bake Salted Caramel Pretzel Bars combine sweet and salty flavors with a delightful crunch. They’re perfect for a simple dessert that comes together in minutes without using the oven.
Ingredients
- 2 cups pretzel crumbs (crushed pretzels)
- 1/2 cup unsalted butter, melted
- 1/4 cup granulated sugar
- 1 cup caramel sauce (store-bought or homemade)
- 1/2 teaspoon sea salt
- 1 cup heavy cream
- 1/2 cup powdered sugar
- 1 teaspoon vanilla extract
Instructions
- Step 1: In a medium bowl, combine pretzel crumbs, melted butter, and granulated sugar. Mix until well combined. Press the mixture firmly into the bottom of a greased 9×9-inch baking dish to form an even layer.
- Step 2: Drizzle the caramel sauce over the pretzel crust. Use a spatula to spread it evenly. Sprinkle the sea salt on top of the caramel layer.
- Step 3: In a large mixing bowl, whip the heavy cream until soft peaks form. Gradually add powdered sugar and vanilla extract, continuing to whip until stiff peaks form.
- Step 4: Spread the whipped cream mixture over the caramel layer in the baking dish, smoothing it out to create an even top layer.
- Step 5: Cover the dish with plastic wrap and refrigerate for at least 2 hours or until the bars are firm and set.
- Step 6: Once chilled, remove from the refrigerator. Cut into squares and serve.
Tips & Variations
- Use homemade caramel sauce for a richer flavor, or choose a high-quality store-bought brand to save time.
- For an extra crunch, sprinkle chopped pretzels or nuts on top before chilling.
- Adjust the sea salt to taste, adding more for a pronounced salty-sweet contrast.
- To make this dessert nut-free, ensure the pretzels and caramel are processed in nut-free facilities.
Storage
Store the bars covered in the refrigerator for up to 4 days. Reheat is not necessary, as they are best enjoyed chilled and firm. If you prefer a softer texture, leave the bars at room temperature for 10-15 minutes before serving.
How to Serve
Serve this delicious recipe with your favorite sides.
FAQs
Can I make these bars ahead of time?
Yes, these bars can be prepared and refrigerated up to 24 hours before serving. This allows the layers to set perfectly and makes for easy entertaining.
What can I use instead of pretzels?
If you prefer, crushed graham crackers or digestive biscuits can be used in place of pretzels for a different flavor and texture.
PrintQuick No-Bake Salted Caramel Pretzel Bars Recipe

These Quick No-Bake Salted Caramel Pretzel Bars combine a crunchy pretzel crust with a rich salted caramel layer, topped with fluffy vanilla whipped cream. Perfect for an easy dessert that requires no oven time and delivers a delicious balance of sweet, salty, and creamy flavors.
- Prep Time: 15 minutes
- Cook Time: 0 minutes
- Total Time: 2 hours 15 minutes
- Yield: 9 to 12 bars 1x
- Category: Dessert
- Method: No-Cook
- Cuisine: American
Ingredients
Crust
- 2 cups pretzel crumbs (crushed pretzels)
- 1/2 cup unsalted butter, melted
- 1/4 cup granulated sugar
Caramel Layer
- 1 cup caramel sauce (store-bought or homemade)
- 1/2 teaspoon sea salt
Whipped Cream Topping
- 1 cup heavy cream
- 1/2 cup powdered sugar
- 1 teaspoon vanilla extract
Instructions
- Prepare the crust: In a medium bowl, combine the crushed pretzel crumbs, melted unsalted butter, and granulated sugar. Mix thoroughly until all the ingredients are well incorporated. Press this mixture firmly and evenly into the bottom of a greased 9×9-inch baking dish to form the crust layer.
- Add the caramel layer: Drizzle the caramel sauce evenly over the pretzel crust. Use a spatula to spread it smoothly across the surface. Sprinkle the sea salt evenly over the caramel to enhance the sweet and salty flavor contrast.
- Whip the cream: In a large mixing bowl, whip the heavy cream until soft peaks begin to form. Gradually add the powdered sugar and vanilla extract while continuing to whip the cream until stiff peaks form, resulting in a smooth and airy texture.
- Top with whipped cream: Spread the whipped cream mixture evenly over the caramel layer in the baking dish. Smooth the surface with a spatula to create a clean, even topping.
- Chill and set: Cover the baking dish with plastic wrap and refrigerate for at least 2 hours, allowing the bars to firm up and set properly for easy slicing.
- Serve: Once chilled and firm, remove the dish from the refrigerator, cut into squares, and enjoy your delicious no-bake salted caramel pretzel bars.
Notes
- For a homemade caramel sauce, you can melt sugar with butter and cream until smooth.
- Make sure to crush the pretzels finely to ensure the crust holds together well.
- Use cold heavy cream for better whipping results.
- Store the bars in an airtight container in the fridge for up to 3 days.
Keywords: no-bake dessert, salted caramel bars, pretzel crust, quick dessert, whipped cream topping, easy sweets