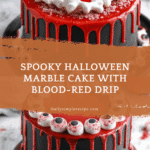
Spooky Halloween Marble Cake Recipe
Introduction
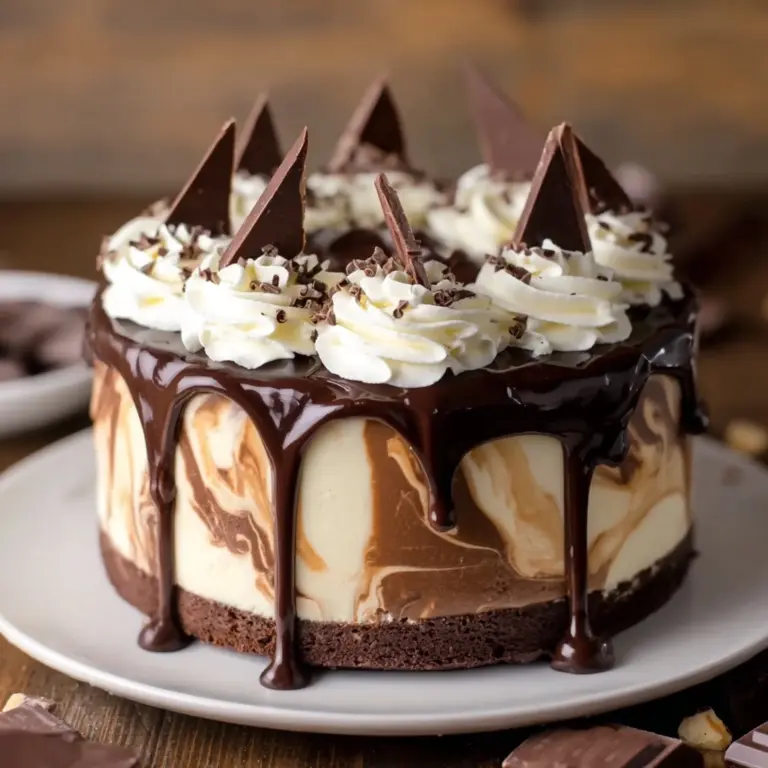
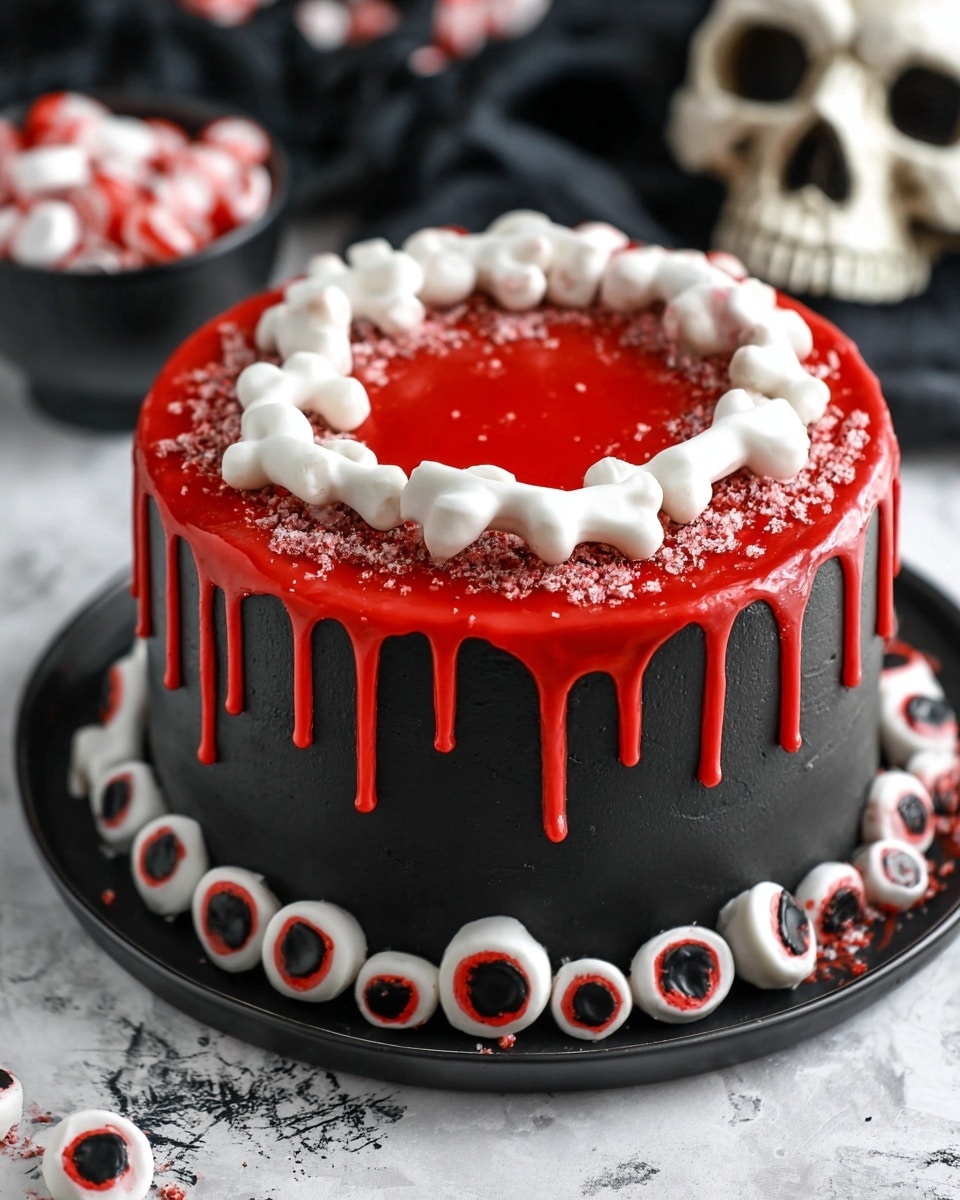
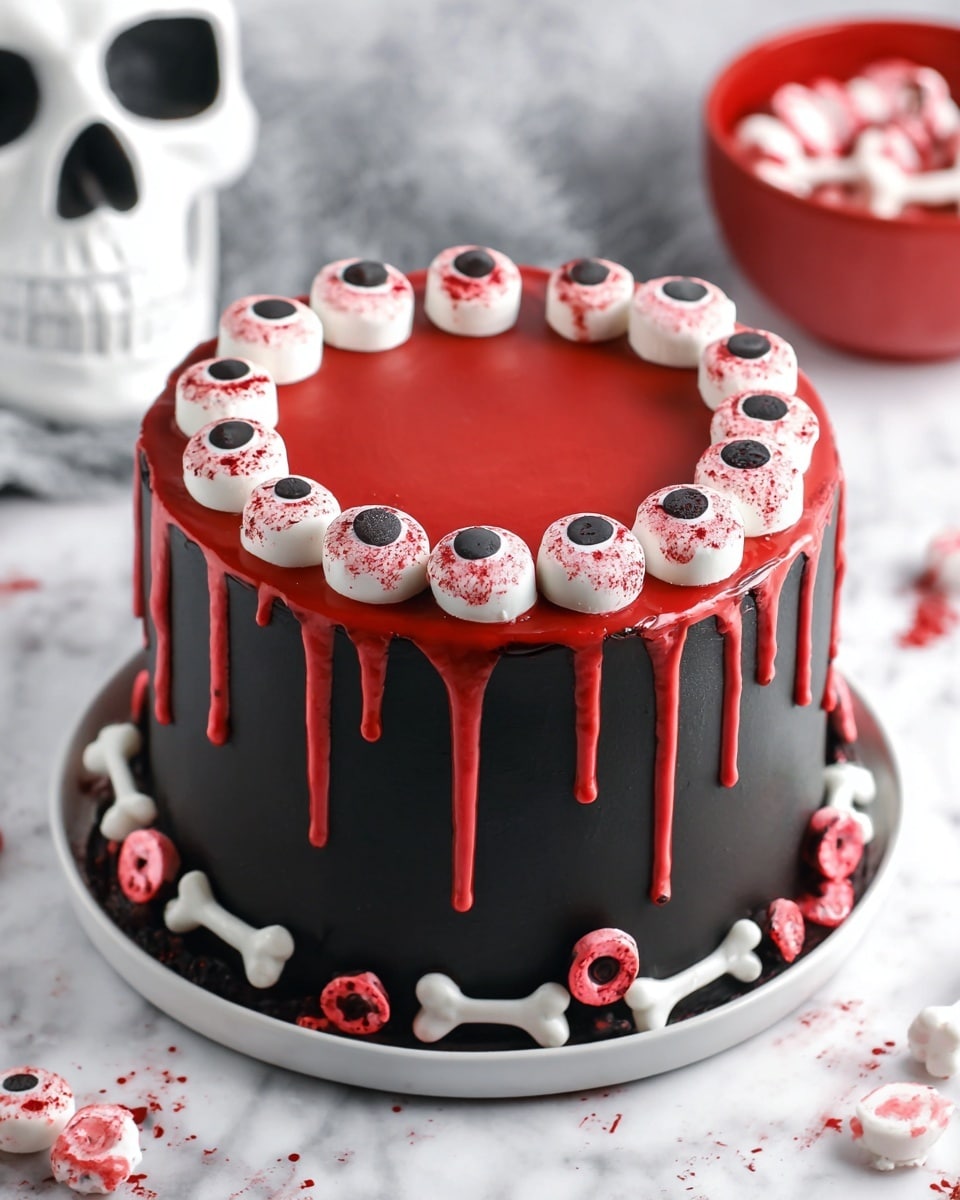
This Spooky Halloween Marble Cake is a festive and delicious treat perfect for celebrating the season. Featuring swirls of red and chocolate batter with rich chocolate buttercream and a dramatic red drip, it’s sure to impress your guests.
Ingredients
- 2 1/4 cups (293g) all purpose flour
- 2 1/2 tsp baking powder
- 1/4 tsp baking soda
- 1/2 tsp salt
- 1/2 cup (112g) unsalted butter, room temperature
- 1/2 cup vegetable oil
- 1 1/2 cups (310g) sugar
- 1 tbsp vanilla extract
- 4 large eggs
- 1 cup (240ml) buttermilk*
- 5 oz bittersweet chocolate (60% cacao), chopped**
- Black gel icing color
- Red gel icing color
- 2 1/4 cups (504g) unsalted butter
- 8 cups (920g) powdered sugar
- 1 cup (114g) natural unsweetened cocoa powder
- 2 tsp vanilla extract
- 5-7 tbsp (75-105ml) water or cream
- 1/4 tsp salt
- Black gel icing color
- 4 oz red Wilton candy melts
- 2 tbsp heavy whipping cream
- Sprinkles (bone and eyeball themed – see notes)
Instructions
- Step 1: Prepare three 8-inch cake pans by lining the bottom with parchment paper circles and greasing the sides. Preheat your oven to 350°F (176°C).
- Step 2: In a medium bowl, whisk together the flour, baking powder, baking soda, and salt. Set aside.
- Step 3: In a large mixing bowl, beat butter, vegetable oil, sugar, and vanilla extract until light and fluffy, about 3-4 minutes.
- Step 4: Add eggs two at a time, mixing well after each addition. Scrape down the bowl sides to incorporate all ingredients.
- Step 5: Add half of the dry ingredients to the batter and mix until combined.
- Step 6: Pour in the buttermilk and mix until fully incorporated.
- Step 7: Add the remaining dry ingredients and mix until smooth. Avoid over mixing and scrape the bowl as needed.
- Step 8: Divide the batter evenly into two bowls. Add red gel icing color to one bowl and fold gently until evenly colored. Set aside.
- Step 9: Melt the chopped bittersweet chocolate. Add melted chocolate and black gel icing color to the other uncolored batter and fold together quickly before chocolate firms up.
- Step 10: Alternate spoonfuls of each batter into the prepared pans. Gently shake the pans side to side to spread the batter evenly. Repeat for all three pans.
- Step 11: Bake for 20-25 minutes, or until a toothpick inserted comes out clean.
- Step 12: Let cakes cool for 2-3 minutes in the pans, then transfer to wire racks to cool completely.
- Step 13: For the frosting, beat butter in a large bowl until smooth.
- Step 14: Add half of the powdered sugar and cocoa powder, mixing until smooth and combined.
- Step 15: Stir in vanilla and 3 tablespoons of water or milk until well combined.
- Step 16: Add remaining powdered sugar and salt, mixing until smooth.
- Step 17: Adjust consistency with additional water or milk as needed. Add black gel icing color until you reach a deep black shade.
- Step 18: Trim domes from the cake layers with a serrated knife to make them flat.
- Step 19: Place the first cake layer on a serving plate or cake board. Spread about 1 cup of chocolate buttercream evenly over the layer.
- Step 20: Add the second cake layer and spread another cup of buttercream.
- Step 21: Place the final cake layer on top and frost the outside of the cake with the remaining chocolate buttercream.
- Step 22: To create the red drip, heat heavy cream just until it starts to boil and pour over the red candy melts. Let sit for 2-3 minutes, then whisk until mostly smooth. Heat in 15-second increments if necessary until fully melted. Let cool slightly.
- Step 23: Drizzle the red candy melt mixture around the edges of the cake and slightly on top edges. Avoid filling the center.
- Step 24: Decorate the cake with bone and eyeball sprinkles for a spooky finish.
Tips & Variations
- Use a food scale to divide batter evenly for consistent cake layers and better marble effect.
- If you don’t have buttermilk, make a substitute by adding 1 tablespoon of vinegar or lemon juice to 1 cup of milk and letting it sit for 5 minutes.
- For a gluten-free version, substitute all-purpose flour with a gluten-free baking blend that includes xanthan gum.
- To intensify the red color, add gel coloring gradually until you reach your desired shade.
- Sprinkles can be found in specialty stores or online; choose Halloween-themed shapes for extra fun.
Storage
Store the cake in an airtight container at room temperature for up to 3-4 days. If you prefer, you can refrigerate it but allow the cake to come to room temperature before serving. Reheat slices gently in the microwave for a few seconds if desired.
How to Serve
Serve this delicious recipe with your favorite sides.
FAQs
Can I make this cake in advance?
Yes, you can bake the cake layers a day ahead and wrap them tightly in plastic wrap. Keep the frosting and decorating for the next day to maintain freshness.
What if I don’t have gel icing colors?
You can use regular liquid food coloring, but gel colors are recommended as they provide more vibrant shades without altering the batter’s consistency.
PrintSpooky Halloween Marble Cake Recipe
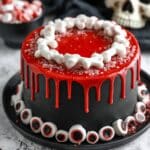
This Spooky Halloween Marble Cake combines rich chocolate and vibrant red swirls baked into moist layers, topped with a silky black chocolate buttercream and a dramatic red candy melt drip. Perfect for Halloween celebrations, this visually striking cake features playful bone and eyeball sprinkles for the ultimate spooky effect.
- Prep Time: 30 minutes
- Cook Time: 25 minutes
- Total Time: 55 minutes
- Yield: 12 servings 1x
- Category: Dessert
- Method: Baking
- Cuisine: American
Ingredients
Cake Ingredients
- 2 1/4 cups (293g) all purpose flour
- 2 1/2 tsp baking powder
- 1/4 tsp baking soda
- 1/2 tsp salt
- 1/2 cup (112g) unsalted butter, room temperature
- 1/2 cup vegetable oil
- 1 1/2 cups (310g) sugar
- 1 tbsp vanilla extract
- 4 large eggs
- 1 cup (240ml) buttermilk
- 5 oz bittersweet chocolate (60% cacao), chopped
- Black gel icing color
- Red gel icing color
Frosting Ingredients
- 2 1/4 cups (504g) unsalted butter
- 8 cups (920g) powdered sugar
- 1 cup (114g) natural unsweetened cocoa powder
- 2 tsp vanilla extract
- 5–7 tbsp (75-105ml) water or cream
- 1/4 tsp salt
- Black gel icing color
Red Drip and Decoration
- 4 oz red Wilton candy melts
- 2 tbsp heavy whipping cream
- Sprinkles (bone and eyeball themed as per notes)
Instructions
- Prepare Cake Pans and Preheat Oven: Grease three 8-inch cake pans and line the bottoms with parchment paper circles. Preheat the oven to 350°F (176°C) to ensure it reaches the right temperature for even baking.
- Mix Dry Ingredients: In a medium bowl, combine the flour, baking powder, baking soda, and salt. Set aside for later use.
- Cream Butter, Oil, Sugar, and Vanilla: In a large mixing bowl, beat the unsalted butter, vegetable oil, sugar, and vanilla extract until light in color and fluffy, about 3-4 minutes. Proper creaming is key for texture.
- Add Eggs: Incorporate the eggs two at a time, mixing well after each addition. Scrape the bowl sides to include all ingredients evenly.
- Combine Batter with Dry Ingredients and Buttermilk: Add half of the dry ingredients to the batter and mix until just combined. Then add the buttermilk and mix well. Finally, add the remaining dry ingredients and mix until smooth, avoiding overmixing.
- Divide and Color Batter: Split the batter evenly into two bowls. Add red gel icing color to one bowl and fold gently to create red-colored batter. Melt the chopped bittersweet chocolate and add it to the other bowl of batter with black gel icing color, folding gently to combine.
- Layer the Batter in Pans: Drop alternating spoonfuls of red and chocolate batter into the prepared cake pans. Gently shake the pans side to side to spread batter evenly and create a marbled effect.
- Bake the Cake: Bake layers for 20-25 minutes or until a toothpick inserted in the center comes out clean. Remove from oven and cool in pans for 2-3 minutes before transferring to wire racks to cool completely.
- Make the Chocolate Buttercream Frosting: Beat butter until smooth. Add half the powdered sugar and cocoa powder and mix to combine. Then add vanilla extract and 3 tablespoons of water or milk, mixing until smooth. Add remaining powdered sugar and salt, mixing well. Adjust consistency with additional water or milk if needed. Tint with black gel icing color to achieve a rich black shade.
- Assemble the Cake: Level cakes by trimming domes with a serrated knife for flat layers. Place one cake layer on a plate or cake board and spread about 1 cup of chocolate buttercream evenly over the top. Add the second layer and frost again, then place the final layer on top and frost the outside of the entire cake smoothly.
- Prepare Red Drip: Place red candy melts in a bowl. Heat heavy whipping cream until just boiling and pour over candy melts. Let sit for 2-3 minutes, then whisk until mostly melted. Heat in 15 second microwave increments, stirring between, until fully melted. Allow to cool slightly before using.
- Decorate Cake with Red Drip and Sprinkles: Drizzle the red candy melt drip around the edges of the cake, including small drips on the top edge but not filling the center. Decorate with bone and eyeball sprinkles for a spooky Halloween finish.
- Storage: Store the cake in an airtight container. Best enjoyed within 3-4 days for optimal freshness and flavor.
Notes
- Use room temperature unsalted butter for proper creaming and a smooth batter.
- Buttermilk can be substituted by adding 1 tablespoon lemon juice or vinegar to 1 cup milk and letting it sit for 5 minutes.
- Work quickly when folding melted chocolate into the batter to avoid it hardening and making mixing difficult.
- For the drip, ensure the candy melt mixture is slightly cooled to control dripping and prevent it from running too far down the sides.
- Bone and eyeball sprinkles are recommended for the Halloween theme; they can be found in specialty baking stores or online.
- Make sure to level the cake layers for a stable, professional-looking stack.
Keywords: Halloween cake, marble cake, chocolate cake, spooky dessert, Halloween dessert, buttercream frosting, red drip cake