Thai Sticky Chicken Fingers Recipe
Introduction
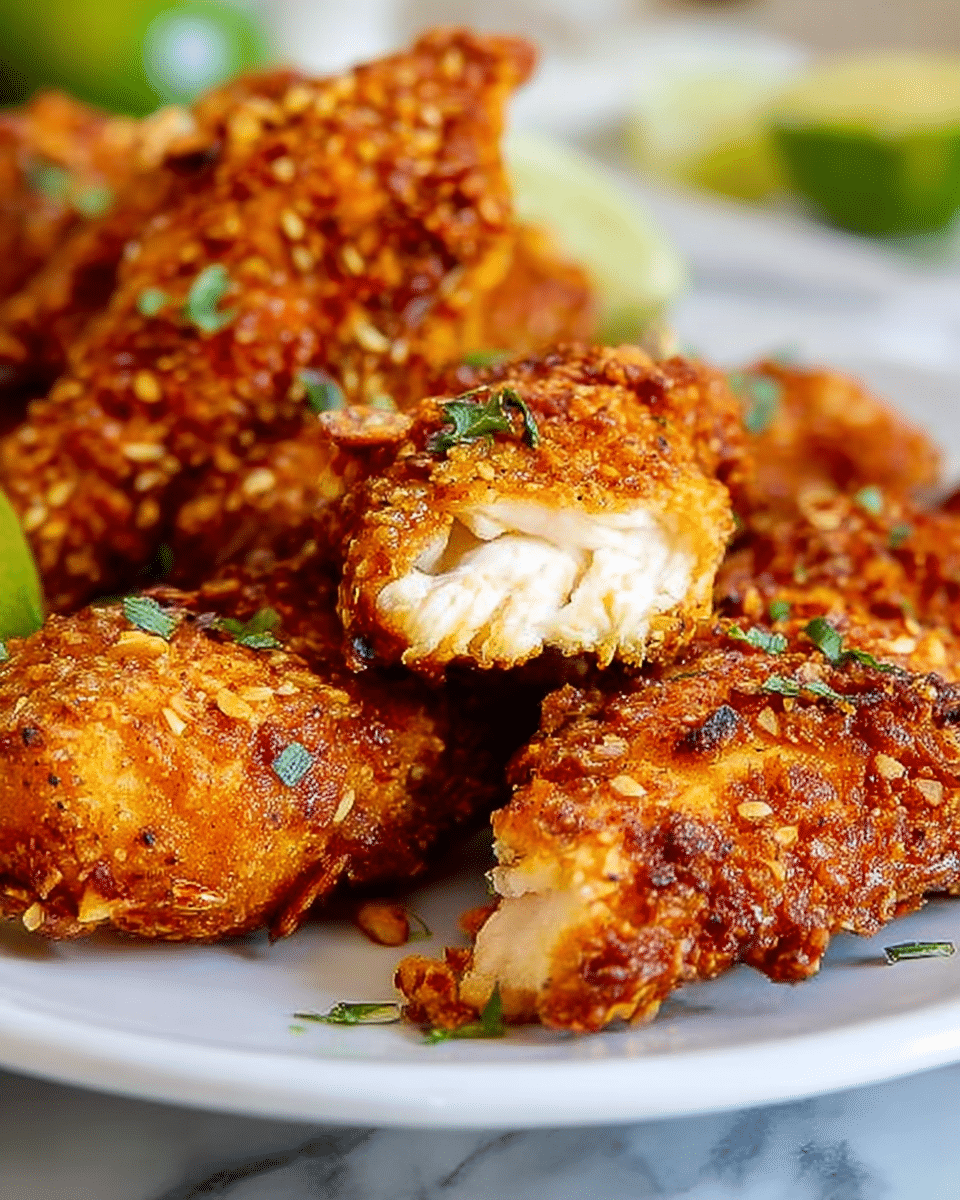
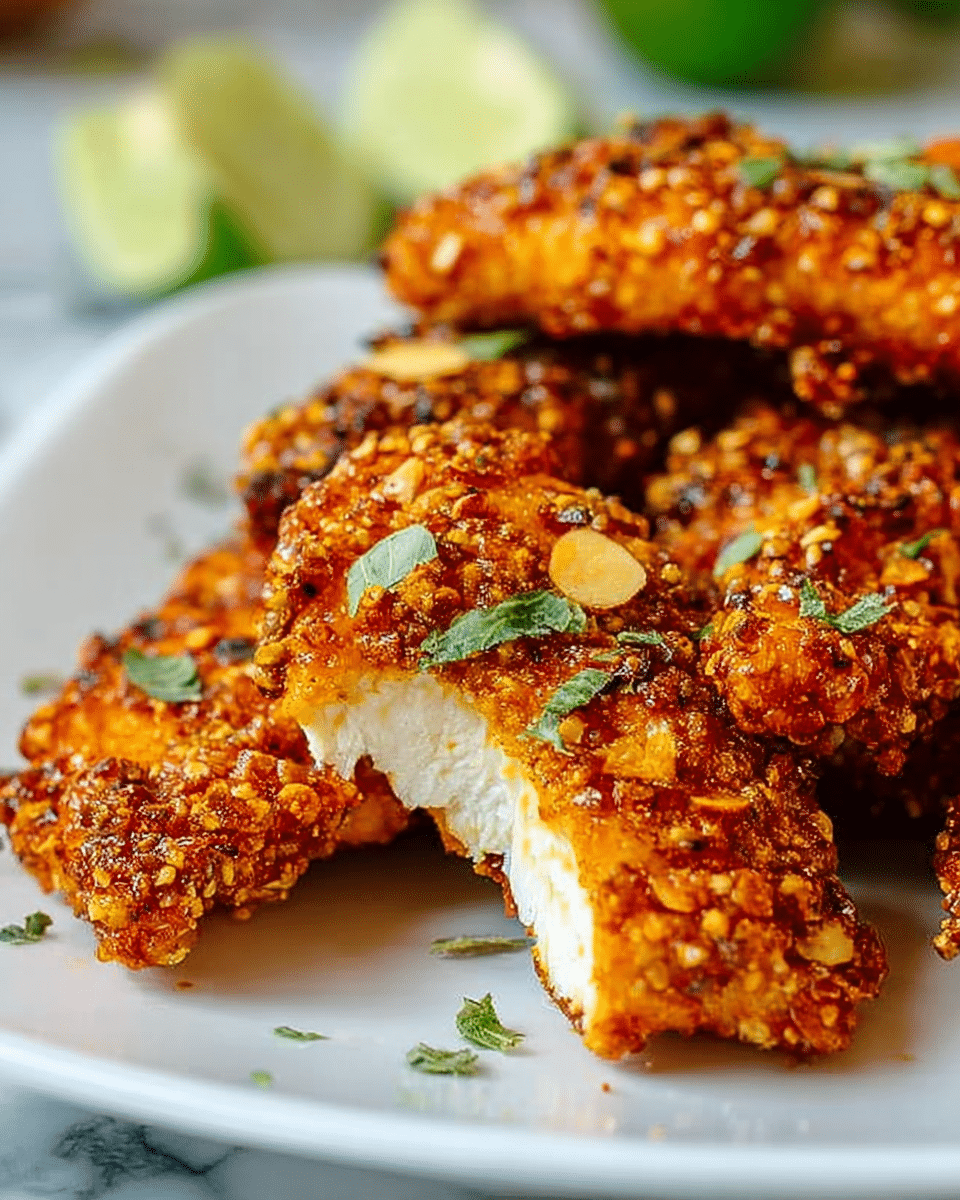
These Thai Sticky Chicken Fingers are a perfect combination of crunchy, sweet, and tangy flavors that everyone will love. Coated with a crunchy almond and rice Chex crust, then glazed in a luscious homemade sauce, they’re ideal for a tasty snack or a flavorful meal.
Ingredients
- 1-3/4 lbs chicken breasts (cut into 1” thick strips)
- 1/2 cup gluten free flour (or all-purpose flour if not gluten free)
- Salt and pepper
- 2 eggs
- 2 Tablespoons milk (any kind)
- 4 cups gluten-free Rice Chex pulverized into 2 cups crumbs OR 2 cups gluten free bread crumbs
- 3/4 cup sliced almonds (divided)
- 1/4 cup cilantro (chopped)
- 1/2 cup sweet chili sauce
- 1/2 cup water
- 1/4 cup brown sugar
- 1/4 cup gluten free reduced-sodium Tamari (or soy sauce if not gluten free)
- 2 Tablespoons rice vinegar
- 2 Tablespoons fresh lime juice
- 1/2 teaspoon ground ginger
- 1 clove garlic (pressed or minced)
- 1/4 teaspoon red chili pepper flakes (or more or less)
Instructions
- Step 1: Line two half-sheet pans with parchment paper or foil, then spray them very well with nonstick spray. Set aside.
- Step 2: In a shallow dish, whisk together eggs and milk. Add 1/2 cup sliced almonds to a food processor and pulse until mostly fine crumbs form. Transfer to another shallow dish. Next, pulse the Rice Chex until finely ground and mix with the almond crumbs. If using store-bought bread crumbs, skip this step. Season the crumb mixture with salt and pepper.
- Step 3: In a large ziplock bag, combine flour, 3/4 teaspoon salt, and 1/2 teaspoon pepper. Add the chicken strips and toss to coat well. Shake off excess flour from each piece.
- Step 4: Dunk each floured chicken strip into the egg mixture, then roll it thoroughly in the almond and bread crumb mixture, pressing gently to make sure the crumbs stick. Arrange the coated chicken fingers on the prepared baking sheets.
- Step 5: Refrigerate the coated chicken fingers for 20-30 minutes to help the breading adhere properly. Do not skip this step, as it ensures the coating stays on while baking.
- Step 6: Preheat the oven to 425°F (220°C). Lightly spray the tops of the chicken fingers with olive oil or nonstick spray. Bake for 10 minutes.
- Step 7: Flip the chicken fingers, spray the tops again with nonstick spray, then return to the oven. Flip and rotate the baking sheets halfway through, baking for an additional 7-9 minutes until the chicken is golden and cooked through.
- Step 8: While the chicken bakes, prepare the sauce. In a small saucepan, combine sweet chili sauce, water, brown sugar, tamari, rice vinegar, lime juice, ground ginger, garlic, and red chili flakes. Bring to a simmer over medium-high heat, then reduce to medium and cook until the sauce thickens slightly, about 5-6 minutes.
- Step 9: Pour the sauce into a wide bowl. Using tongs, dunk the baked chicken fingers into the sauce, then place them back on the baking sheets. Bake for another 4-5 minutes, watching closely to prevent burning.
- Step 10: Serve the chicken fingers sprinkled with the remaining sliced almonds and chopped cilantro for a fresh, crunchy finish.
Tips & Variations
- For extra crunch, use homemade almond and Rice Chex crumbs rather than store-bought bread crumbs.
- If you prefer less heat, adjust or omit the red chili flakes in the sauce.
- Substitute lime juice with lemon juice for a slightly different citrus flavor.
- Serve with a side of steamed jasmine rice or a fresh salad to make it a complete meal.
Storage
Store leftover chicken fingers in an airtight container in the refrigerator for up to 3 days. Reheat them in a toaster oven or regular oven at 350°F (175°C) for 8-10 minutes to maintain crispiness. Avoid microwaving if you want to keep the coating crunchy.
How to Serve
Serve this delicious recipe with your favorite sides.
FAQs
Can I use a different type of nut instead of almonds?
Yes, you can substitute sliced almonds with pecans or cashews for a different flavor and texture, but chop them finely to help the crumbs adhere better.
Is this recipe suitable for gluten-free diets?
Absolutely, as long as you use gluten-free flour, Rice Chex, bread crumbs, and tamari. Double-check all ingredient labels to ensure they are certified gluten free.
PrintThai Sticky Chicken Fingers Recipe

Delicious and crispy Thai Sticky Chicken Fingers coated with a crunchy almond and gluten-free bread crumb mixture, baked to golden perfection and glazed with a sweet and tangy homemade Thai sticky sauce made from sweet chili sauce, tamari, lime juice, and spices. A perfect appetizer or main dish with vibrant flavors and a satisfying crunch.
- Prep Time: 15 minutes
- Cook Time: 30 minutes
- Total Time: 45 minutes
- Yield: 4–6 servings 1x
- Category: Appetizer
- Method: Baking
- Cuisine: Thai
- Diet: Gluten Free
Ingredients
Chicken and Coating
- 1–3/4 lbs chicken breasts (cut into 1” thick strips)
- 1/2 cup gluten free flour (or all-purpose flour if not gluten-free)
- Salt and pepper to taste
- 2 eggs
- 2 Tablespoons milk (any kind)
- 4 cups gluten-free Rice Chex pulverized into 2 cups crumbs OR 2 cups gluten free bread crumbs
- 3/4 cup sliced almonds (divided)
Sauce
- 1/2 cup sweet chili sauce
- 1/2 cup water
- 1/4 cup brown sugar
- 1/4 cup gluten free reduced-sodium Tamari (or soy sauce if not gluten-free)
- 2 Tablespoons rice vinegar
- 2 Tablespoons fresh lime juice
- 1/2 teaspoon ground ginger
- 1 clove garlic (pressed or minced)
- 1/4 teaspoon red chili pepper flakes (adjust to taste)
- 1/4 cup cilantro (chopped, for garnish)
Instructions
- Line pans: Line two half sheet pans with parchment paper or foil and spray them very well with nonstick spray. Set aside to prepare for baking the chicken fingers.
- Prepare coatings: Whisk eggs and milk together in a shallow dish. Process 1/2 cup sliced almonds in a food processor until they become mostly fine crumbs, then transfer to another shallow dish. Next, process the gluten-free Rice Chex cereal into fine crumbs using the food processor, then add these crumbs to the almond crumbs. If using store-bought bread crumbs, skip the processing steps. Season the combined almond and bread crumb mixture with salt and pepper to taste.
- Coat chicken: Add flour, 3/4 teaspoon salt, and 1/2 teaspoon pepper to a large Ziplock bag and toss in the chicken strips. Shake the bag to evenly coat the chicken with flour mixture. Working in batches, shake off excess flour, then dunk the chicken fingers into the egg mixture, followed by rolling them thoroughly in the almond and bread crumb mixture, pressing gently to ensure crumbs adhere well. Place the coated chicken fingers onto the prepared baking sheets. Refrigerate for 20-30 minutes to allow the breading to fully adhere and prevent it from falling off during baking.
- Bake chicken: Preheat the oven to 425°F (220°C). Spray the tops of the chicken fingers with extra virgin olive oil or nonstick spray. Bake for 10 minutes, then flip each chicken finger, spray again with nonstick spray, rotate the baking sheets for even cooking, and bake for an additional 7-9 minutes until they are golden brown and cooked through.
- Prepare sauce: While the chicken bakes, combine sweet chili sauce, water, brown sugar, tamari, rice vinegar, lime juice, ground ginger, minced garlic, and red chili flakes in a small saucepan. Bring to a simmer over medium-high heat. Reduce heat to medium and let simmer for 5-6 minutes until the sauce thickens and reduces slightly.
- Glaze and finish baking: Pour the prepared sauce into a wide bowl. Using tongs, dunk each baked chicken finger into the sauce to coat thoroughly, then return them to the baking sheets. Bake for an additional 4-5 minutes, watching closely to avoid burning, until the sauce is sticky and caramelized.
- Garnish and serve: Remove chicken fingers from the oven and sprinkle with remaining 1/4 cup sliced almonds and chopped cilantro for a fresh and crunchy finish. Serve immediately.
Notes
- Refrigerating the coated chicken fingers before baking is crucial to help the breading adhere and prevent it from falling off during cooking.
- If you do not have gluten-free Rice Chex or bread crumbs, regular bread crumbs can be substituted but the recipe will not be gluten-free.
- Adjust the amount of red chili flakes according to your preferred spice level.
- For a crispier crust, spray lightly with oil both before baking and after flipping.
- Leftover chicken fingers can be reheated in the oven to maintain crispiness but may lose some sauce stickiness.
- This recipe can be doubled for larger gatherings and works well as finger food or an entrée with rice or vegetables.
Keywords: Thai sticky chicken fingers, gluten free chicken fingers, almond crust chicken, baked chicken fingers, Thai chicken recipe, sticky chicken wings alternative, healthy chicken appetizer